
- Handle Custom Stripe Webhook Events
- suredonation_export_secret_option_keys Filter Hook
- suredonation_import_batch_complete Action Hook
- suredonation_import_complete Action Hook
- suredonation_import_donation_inserted Action Hook
- suredonation_import_donor_inserted Action Hook
- suredonation_import_session_created Action Hook
- suredonation_import_givewp_batch_complete Action Hook
- suredonation_import_givewp_session_created Action Hook
- suredonation_privacy_data_exported Action Hook
- Validate Field Filter Hook
- Validatable Blocks Filter Hook
- Update donation data, Filter Hook
- OttoKit Integration: suredonation_suretriggers_integration_data_filter Filter Hook
- suredonation_show_setup_gateway_notice Filter Hook
- suredonation_show_review_notice_gateway Filter Hook
- suredonation_show_review_notice_donation Filter Hook
- suredonation_registered_payment_methods Filter Hook
- suredonation_register_additional_blocks Filter Hook
- suredonation_receipt_html Filter Hook
- Validatable Blocks Filter Hook
- Update donation data, Filter Hook
- OttoKit Integration: suredonation_suretriggers_integration_data_filter Filter Hook
- suredonation_show_setup_gateway_notice Filter Hook
- suredonation_show_review_notice_gateway Filter Hook
- suredonation_show_review_notice_donation Filter Hook
- suredonation_registered_payment_methods Filter Hook
- suredonation_register_additional_blocks Filter Hook
- suredonation_receipt_html Filter Hook
- suredonation_phone_geo_enabled Filter Hook
SureDonation Onboarding Wizard
The SureDonation onboarding wizard helps you quickly configure the plugin after installation. It walks you through creating your first donation campaign and prepares your website to start accepting donations.
The onboarding process consists of four simple steps.
Launch the Onboarding Wizard
After activating SureDonation, the onboarding wizard opens automatically.
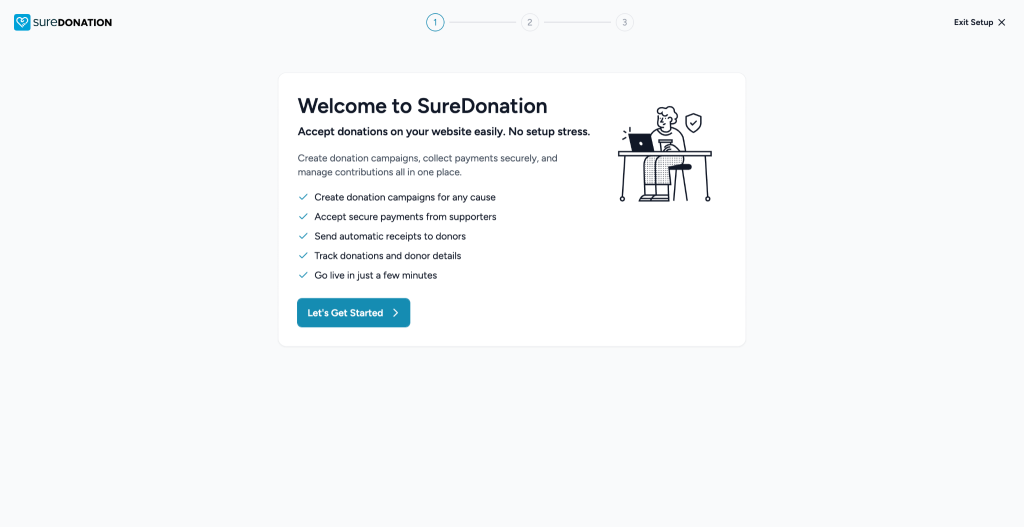
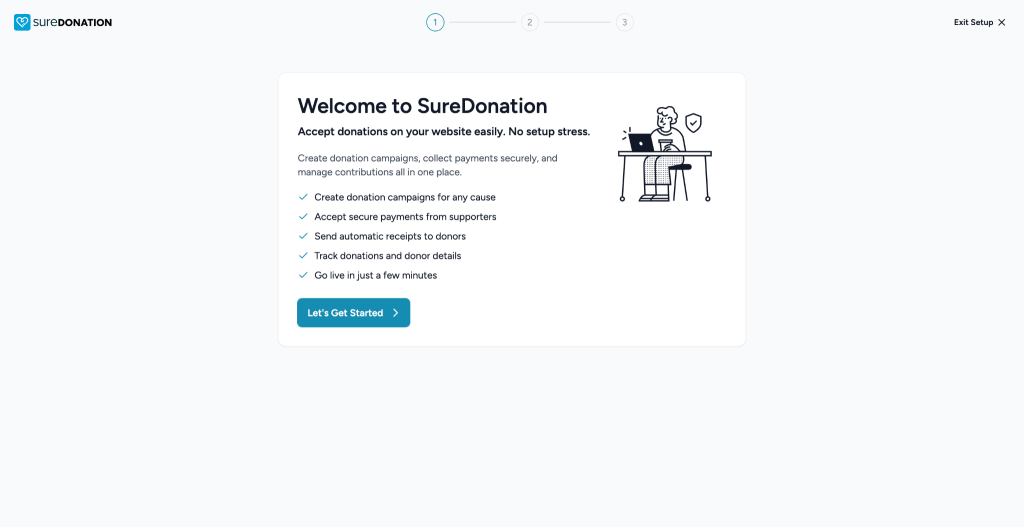
Step 1: Welcome to SureDonation
The first screen introduces SureDonation and explains what you can accomplish with the plugin.
It highlights that you can:
- Create donation campaigns for any cause.
- Accept secure online donations.
- Send automatic donation receipts to donors.
- Track donations and donor information.
- Start accepting donations in just a few minutes.
To continue, click Let’s Get Started.
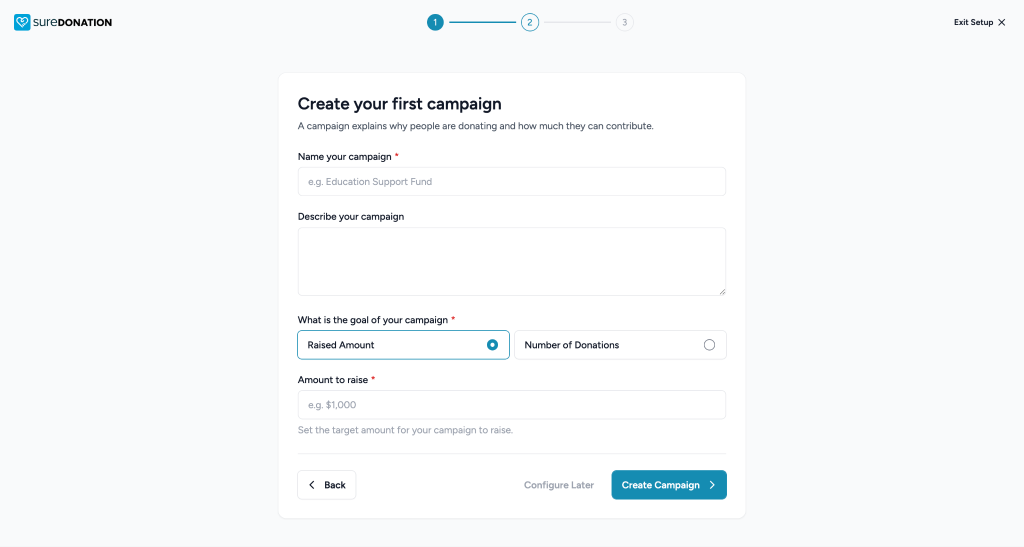
Step 2: Create Your First Campaign
The second step allows you to create your first donation campaign.
Fill in the following information:
Campaign Name
Enter a name for your campaign.
Example: Education Support Fund
Campaign Description
Add a short description explaining your fundraising campaign.
Campaign Goal
Choose how you want to measure the campaign’s success.
Available options:
- Raised Amount – Set a target fundraising amount.
- Number of Donations – Set a target number of donations.
Amount to Raise
If you select Raised Amount, enter the fundraising goal.
Example: $1,000
Once you’ve completed the required fields, click Create Campaign.
If you’d rather create a campaign later, click Configure Later.
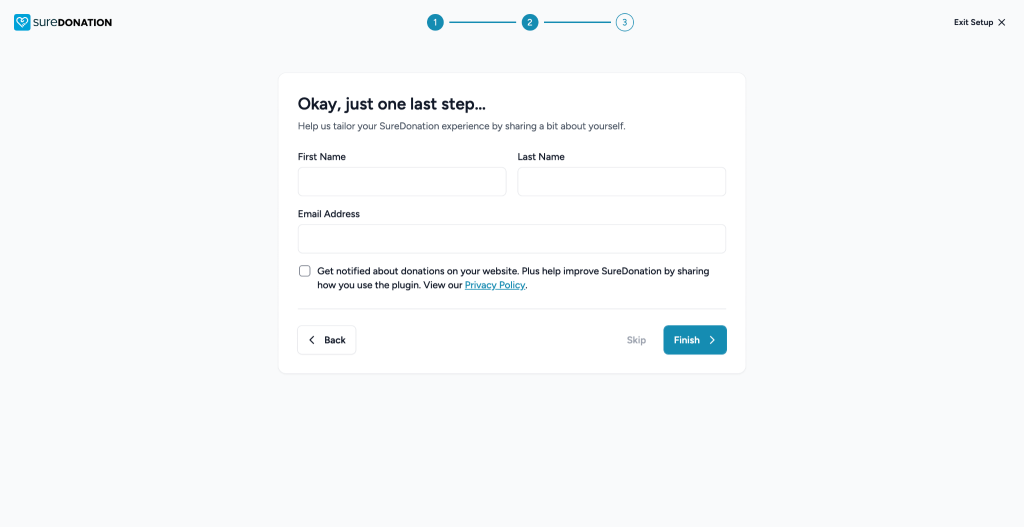
Step 3: Share Your Details
In the third step, SureDonation asks for some basic information to personalize your experience.
Provide the following details:
- First Name
- Last Name
- Email Address
Optionally, enable the checkbox to:
- Receive donation notifications.
- Help improve SureDonation by sharing anonymous usage information.
If you don’t want to provide this information, click Skip.
Otherwise, click Finish to continue.
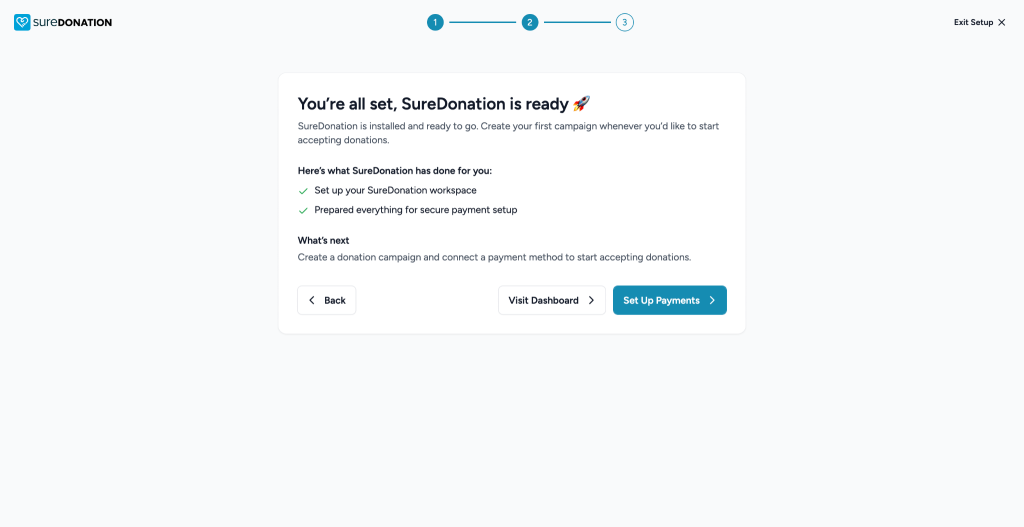
Step 4: Setup Complete
Once you’ve completed the onboarding, you’ll see a confirmation screen indicating that SureDonation is ready to use.
The wizard confirms that it has:
- Set up your SureDonation workspace.
- Prepared your site for secure payment configuration.
From here, you have two options:
Visit Dashboard
Click Visit Dashboard to start managing campaigns, donors, and donations.
Set Up Payments
Click Set Up Payments to connect a payment gateway such as Stripe or PayPal so you can begin accepting donations.
Exit the Setup Wizard
If you don’t want to complete the onboarding immediately, click Exit Setup in the top-right corner of any onboarding screen.
You can manually configure SureDonation later from: SureDonation → Settings
We don't respond to the article feedback, we use it to improve our support content.