
- Add New Form
- Form Settings in SureDonation
- Set a Default Donation Form in SureDonation
- Text Field in SureDonation
- Email Field in SureDonation
- Number Field in SureDonation
- Donation Amount Field in SureDonation
- Payment Field in SureDonation
- Donate Button in SureDonation
- Cover Processing Fees Field
- Handle Custom Stripe Webhook Events
- suredonation_export_secret_option_keys Filter Hook
- suredonation_import_batch_complete Action Hook
- suredonation_import_complete Action Hook
- suredonation_import_donation_inserted Action Hook
- suredonation_import_donor_inserted Action Hook
- suredonation_import_session_created Action Hook
- suredonation_import_givewp_batch_complete Action Hook
- suredonation_import_givewp_session_created Action Hook
- suredonation_privacy_data_exported Action Hook
- Validate Field Filter Hook
- Validatable Blocks Filter Hook
- Update donation data, Filter Hook
- OttoKit Integration: suredonation_suretriggers_integration_data_filter Filter Hook
- suredonation_show_setup_gateway_notice Filter Hook
- suredonation_show_review_notice_gateway Filter Hook
- suredonation_show_review_notice_donation Filter Hook
- suredonation_registered_payment_methods Filter Hook
- suredonation_register_additional_blocks Filter Hook
- suredonation_receipt_html Filter Hook
- Validatable Blocks Filter Hook
- Update donation data, Filter Hook
- OttoKit Integration: suredonation_suretriggers_integration_data_filter Filter Hook
- suredonation_show_setup_gateway_notice Filter Hook
- suredonation_show_review_notice_gateway Filter Hook
- suredonation_show_review_notice_donation Filter Hook
- suredonation_registered_payment_methods Filter Hook
- suredonation_register_additional_blocks Filter Hook
- suredonation_receipt_html Filter Hook
- suredonation_phone_geo_enabled Filter Hook
Creating and Managing Campaigns in SureDonation
The Campaigns section in SureDonation allows you to create and manage donation campaigns for your fundraising causes.
From this page, you can create new campaigns, search existing campaigns, filter campaigns by status, view campaign progress, duplicate campaigns, edit campaign details, or move campaigns to trash.
Access Campaigns
To access the Campaigns section:
- Log in to your WordPress Dashboard.
- Navigate to SureDonation > Campaigns.
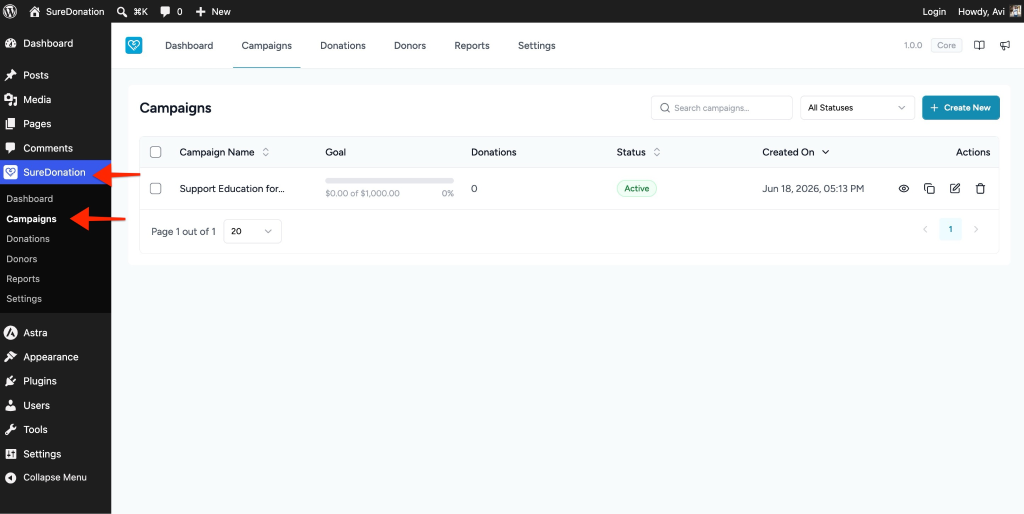
You will see a list of existing donation campaigns.
Create a New Campaign
To create a new campaign:
- Go to SureDonation > Campaigns.
- Click the Create New button from the top-right corner.
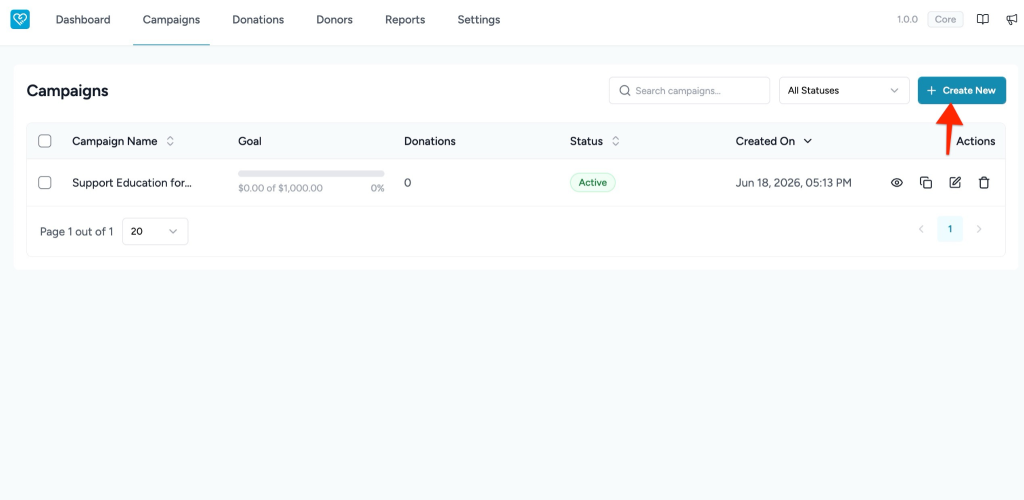
A slide-in panel titled New Campaign will appear from the right side of the screen.
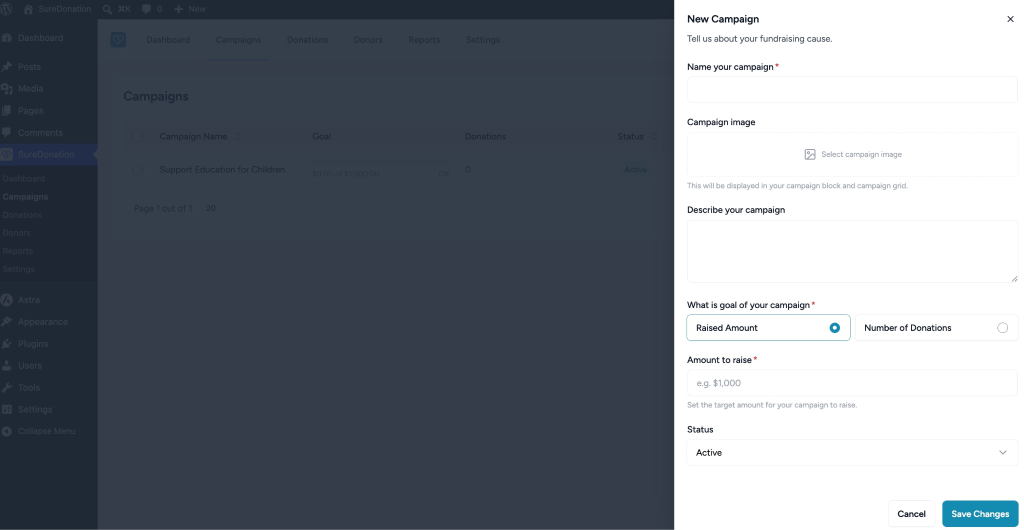
New Campaign Settings
The New Campaign panel allows you to add details about your fundraising cause.
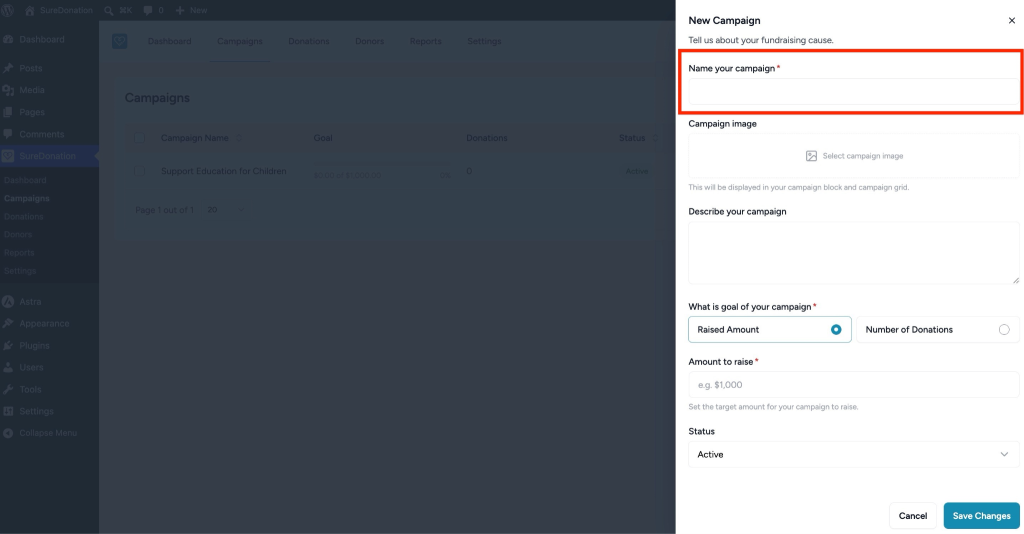
Name Your Campaign
Enter the name of your donation campaign.
This field is required and helps identify the campaign on your website and inside the SureDonation dashboard.
Example: Support Education for Children
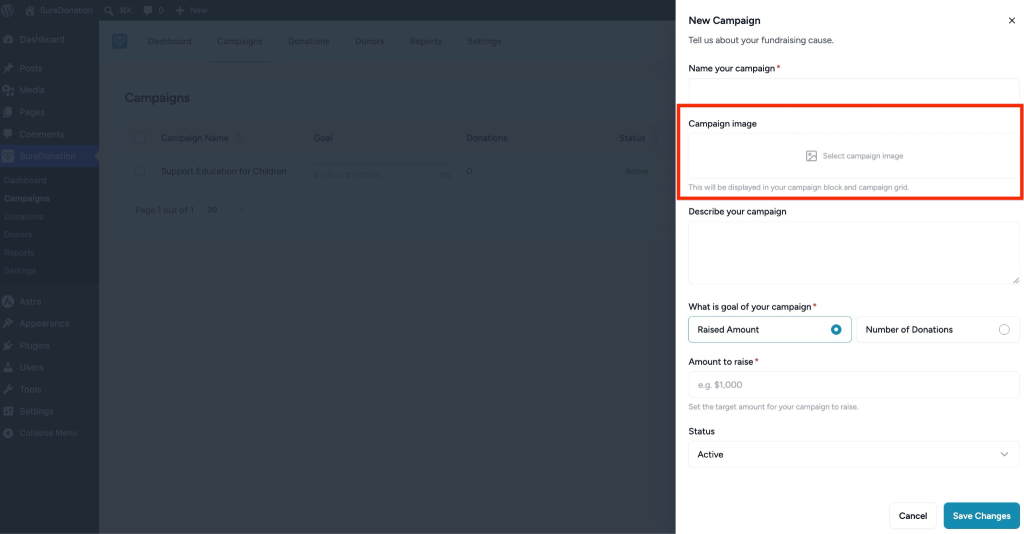
Campaign Image
Use the Campaign image option to add an image for your campaign.
To add an image:
- Click Select campaign image.
- Choose or upload an image from the WordPress Media Library.
This image will be displayed in your campaign block and campaign grid.
Describe Your Campaign
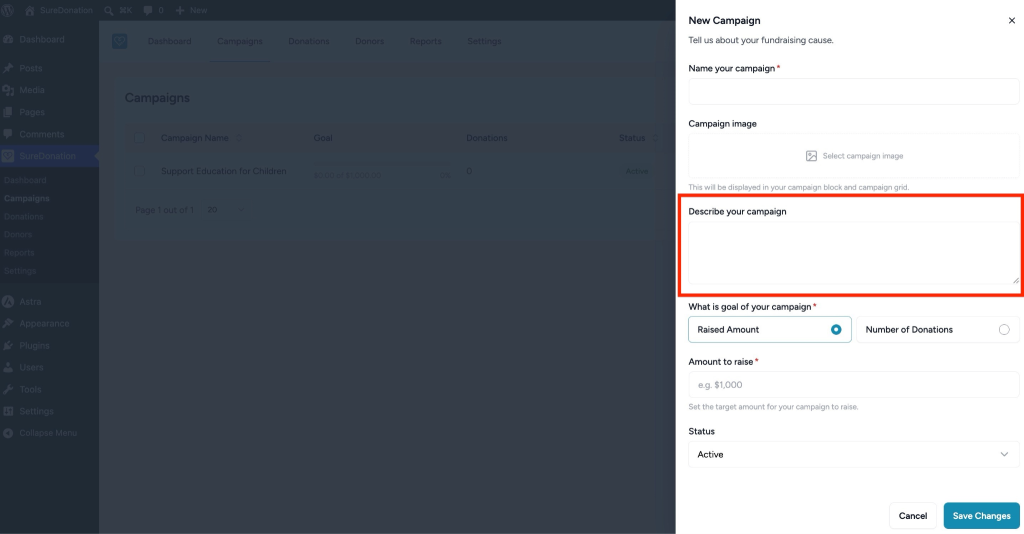
Use the Describe your campaign field to explain the purpose of your fundraising campaign.
You can include details such as:
- What the campaign supports.
- Why donations are needed.
- How the collected amount will be used.
Example:
Help us raise funds to provide school supplies, books, and learning materials for children in need.
Choose the Campaign Goal
In the What is goal of your campaign section, select how you want to track the campaign goal.
You can choose one of the following options:
Raised Amount
Select Raised Amount if you want to set a target donation amount for the campaign.
Example: $1,000
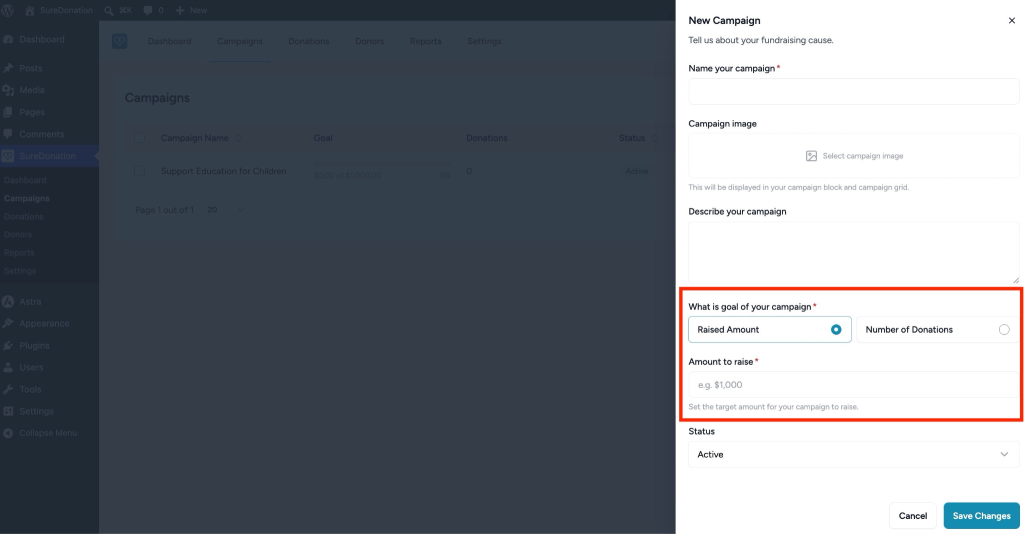
This amount is used to track the campaign’s progress toward the fundraising goal.
Number of Donations
Select Number of Donations if you want the campaign goal to be based on the number of donations received.
Example: 100
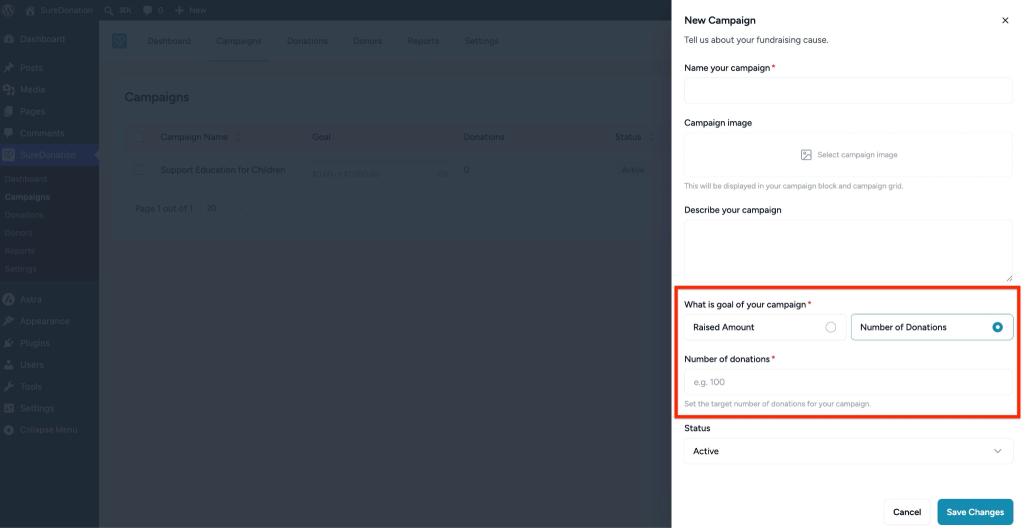
This number is used to track the campaign’s progress toward the fundraising goal.
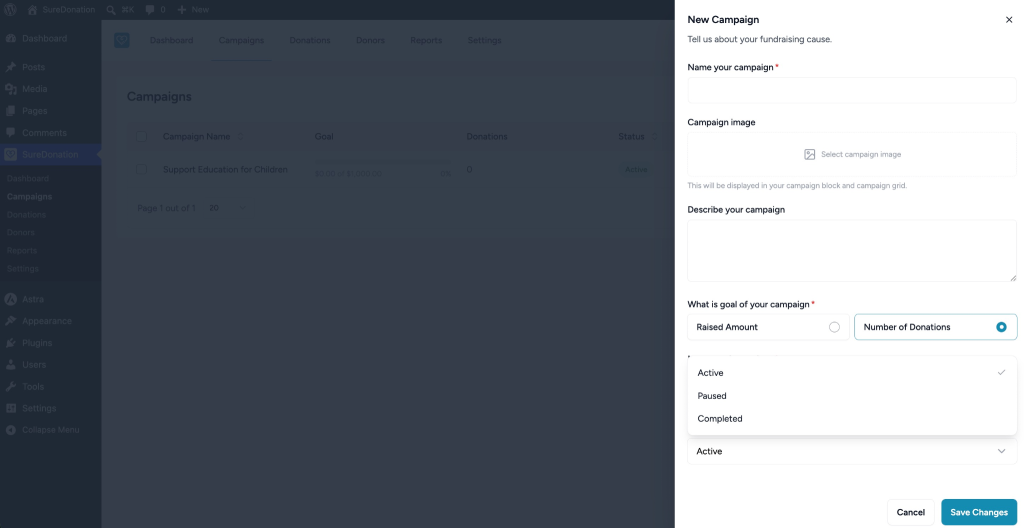
Set Campaign Status
Use the Status dropdown to define the current state of the campaign.
Available status options include:
Active
Select Active when the campaign is live and ready to accept donations.
Paused
Select Paused when you want to temporarily stop accepting donations for the campaign.
Completed
Select Completed when the campaign goal has been achieved or the fundraising activity has ended.
Save or Cancel the Campaign
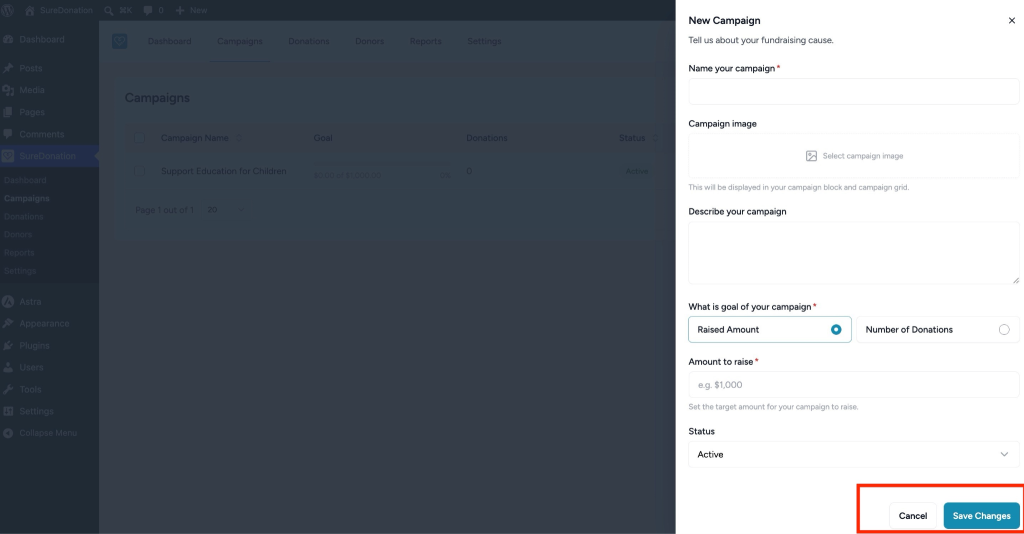
After entering the campaign details, you can choose one of the following actions:
Cancel
Click Cancel to close the New Campaign panel without saving changes.
Save Changes
Click Save Changes to create and save the campaign.
Once saved, the campaign will be available in the Campaigns section and can be used to collect donations on your site.
Important Note
Make sure all required fields are completed before saving the campaign. Required fields are marked with an asterisk (*).
Managing Campaigns
After a campaign is created, it will be listed under SureDonation > Campaigns.
The campaigns table displays important campaign details such as campaign name, goal, donation count, status, created date, and available actions.
Campaign Table Overview
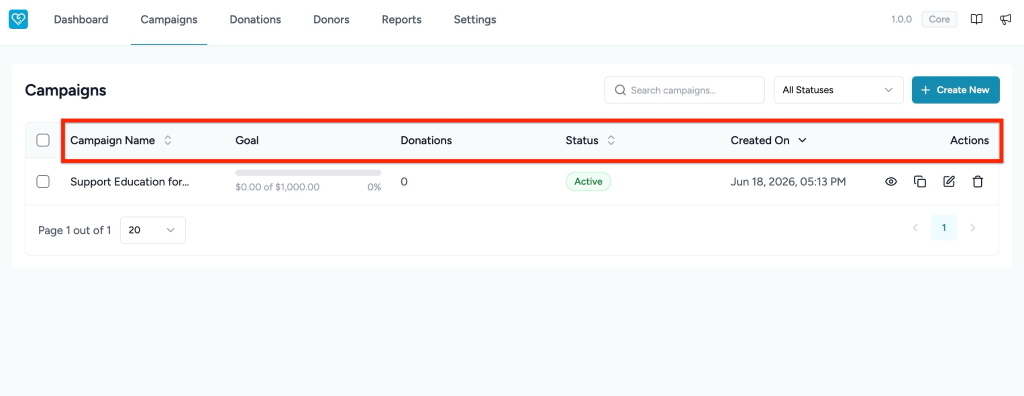
The Campaigns table includes the following columns:
Campaign Name
Displays the name of the campaign.
Example: Support Education for Children
Goal
Displays the campaign progress.
Example: $0.00 of $1,000.00
You can also see the progress percentage, such as: 0%
Donations
Displays the number of donations received for the campaign.
Example: 0
Status
Displays the current status of the campaign.
Example: Active or Paused
Created On
Displays the date and time when the campaign was created.
Example Jun 18, 2026, 05:13 PM
Actions
The Actions column includes quick options to manage the campaign.
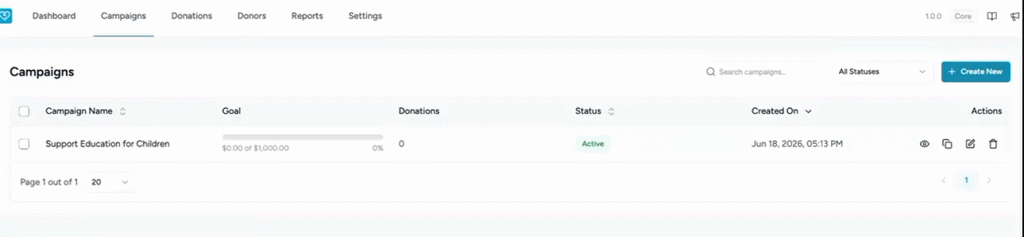
Available actions include:
- View – View icon from the Actions column to open the campaign dashboard page. View Campaign Dashboard
- Duplicate – Create a copy of the existing campaign.
- Edit – Modify campaign details.
- Move to Trash – Move the campaign to trash.
Search Campaigns
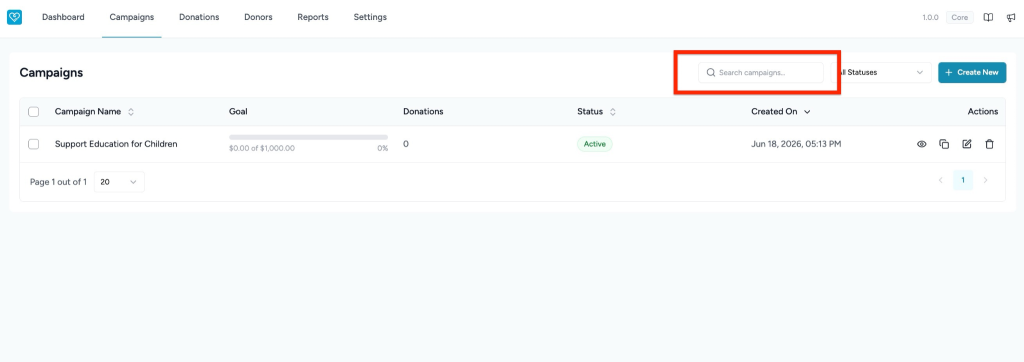
Use the Search campaigns field to quickly find a campaign by name.
To search:
- Go to SureDonation > Campaigns.
- Click the Search campaigns field.
- Enter the campaign name or keyword.
The campaign list will update based on your search.
Filter Campaigns by Status
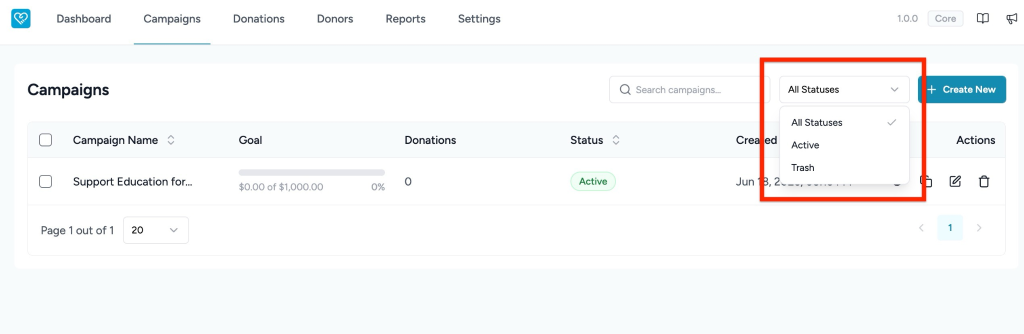
Use the All Statuses dropdown to filter campaigns by status.
Available filter options include:
- All Statuses: Displays all campaigns.
- Active: Displays only active campaigns.
- Trash: Displays campaigns moved to trash.
To filter campaigns:
- Go to SureDonation > Campaigns.
- Click the All Statuses dropdown.
- Select the status you want to view.
View a Campaign
Use the View icon from the Actions column to view or preview the campaign.
To view a campaign:
- Go to SureDonation > Campaigns.
- Locate the campaign you want to view.
- Click the View icon under Actions.
Duplicate a Campaign
The Duplicate option allows you to create a copy of an existing campaign.
This is useful when you want to reuse campaign settings for a new fundraising cause.
To duplicate a campaign:
- Go to SureDonation > Campaigns.
- Locate the campaign you want to duplicate.
- Click the Duplicate icon under Actions.
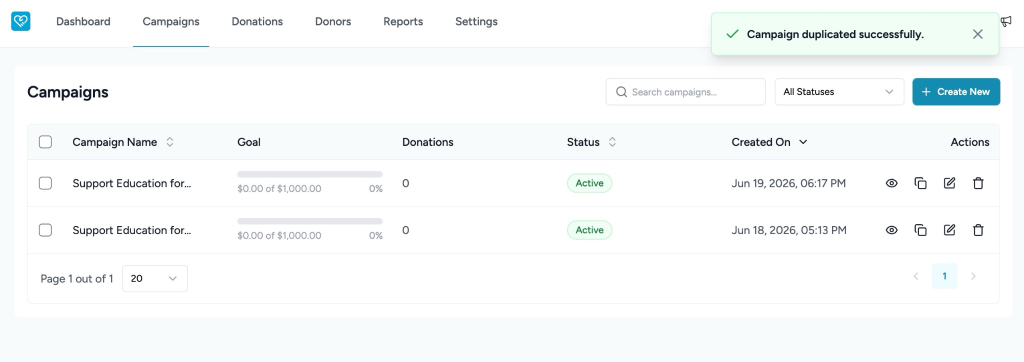
A copy of the campaign will be created and can be edited as needed.
Edit a Campaign
Use the Edit option to update campaign details such as title, image, description, goal amount, or status.
To edit a campaign:
- Go to SureDonation > Campaigns.
- Locate the campaign you want to update.
- Click the Edit icon under Actions.
- Update the campaign details.
- Click Save Changes.
Move a Campaign to Trash
Use the Move to Trash option to remove a campaign from the active campaigns list.
To move a campaign to trash:
- Go to SureDonation > Campaigns.
- Locate the campaign you want to remove.
- Click the Trash icon under Actions.
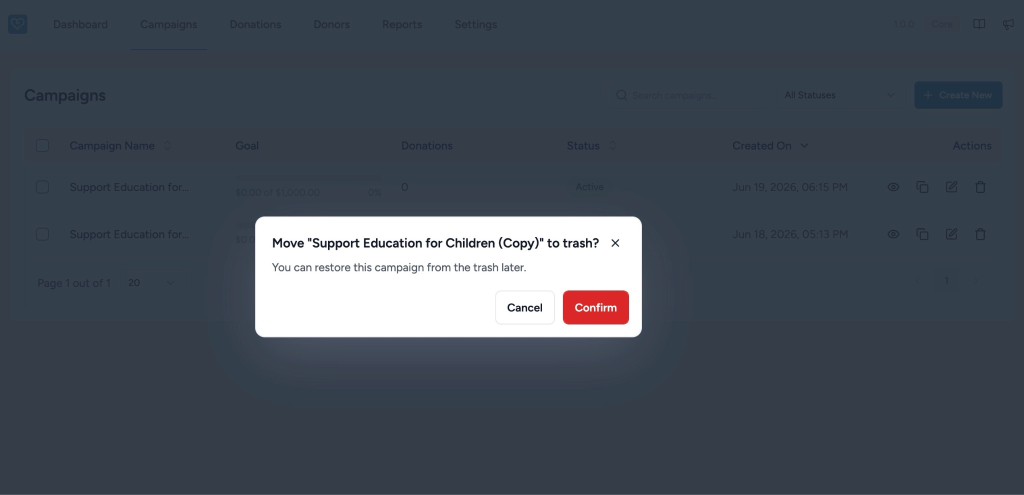
The campaign will be moved to Trash.
Pagination
At the bottom of the Campaigns table, you can view pagination details.
Example: Page 1 out of 1
You can also select how many campaigns should appear per page using the dropdown.
Example: 20, 50
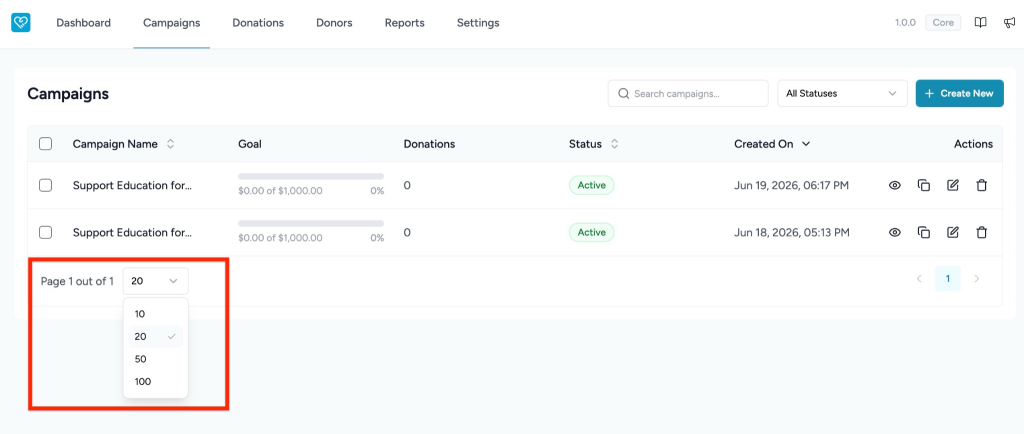
Use the pagination arrows to move between pages when multiple pages are available.
We don't respond to the article feedback, we use it to improve our support content.