
- Add New Form
- Form Settings in SureDonation
- Set a Default Donation Form in SureDonation
- Text Field in SureDonation
- Email Field in SureDonation
- Number Field in SureDonation
- Donation Amount Field in SureDonation
- Payment Field in SureDonation
- Donate Button in SureDonation
- Cover Processing Fees Field
- Anonymous Donation Field
- Time Picker Field in SureDonation
- Handle Custom Stripe Webhook Events
- suredonation_export_secret_option_keys Filter Hook
- suredonation_import_batch_complete Action Hook
- suredonation_import_complete Action Hook
- suredonation_import_donation_inserted Action Hook
- suredonation_import_donor_inserted Action Hook
- suredonation_import_session_created Action Hook
- suredonation_import_givewp_batch_complete Action Hook
- suredonation_import_givewp_session_created Action Hook
- suredonation_privacy_data_exported Action Hook
- Validate Field Filter Hook
- Validatable Blocks Filter Hook
- Update donation data, Filter Hook
- OttoKit Integration: suredonation_suretriggers_integration_data_filter Filter Hook
- suredonation_show_setup_gateway_notice Filter Hook
- suredonation_show_review_notice_gateway Filter Hook
- suredonation_show_review_notice_donation Filter Hook
- suredonation_registered_payment_methods Filter Hook
- suredonation_register_additional_blocks Filter Hook
- suredonation_receipt_html Filter Hook
- Validatable Blocks Filter Hook
- Update donation data, Filter Hook
- OttoKit Integration: suredonation_suretriggers_integration_data_filter Filter Hook
- suredonation_show_setup_gateway_notice Filter Hook
- suredonation_show_review_notice_gateway Filter Hook
- suredonation_show_review_notice_donation Filter Hook
- suredonation_registered_payment_methods Filter Hook
- suredonation_register_additional_blocks Filter Hook
- suredonation_receipt_html Filter Hook
- suredonation_phone_geo_enabled Filter Hook
Add New Form
The Add New Form option allows you to create additional donation forms for a campaign and customize the donation experience based on your requirements.
You can create multiple forms for a single campaign and configure different fields, layouts, and donation options.
Accessing Add New Form
To create a new donation form:
- Navigate to SureDonation → Campaigns.
- Open the campaign where you want to add a new form.
- Click the Add New Form button on the campaign page.
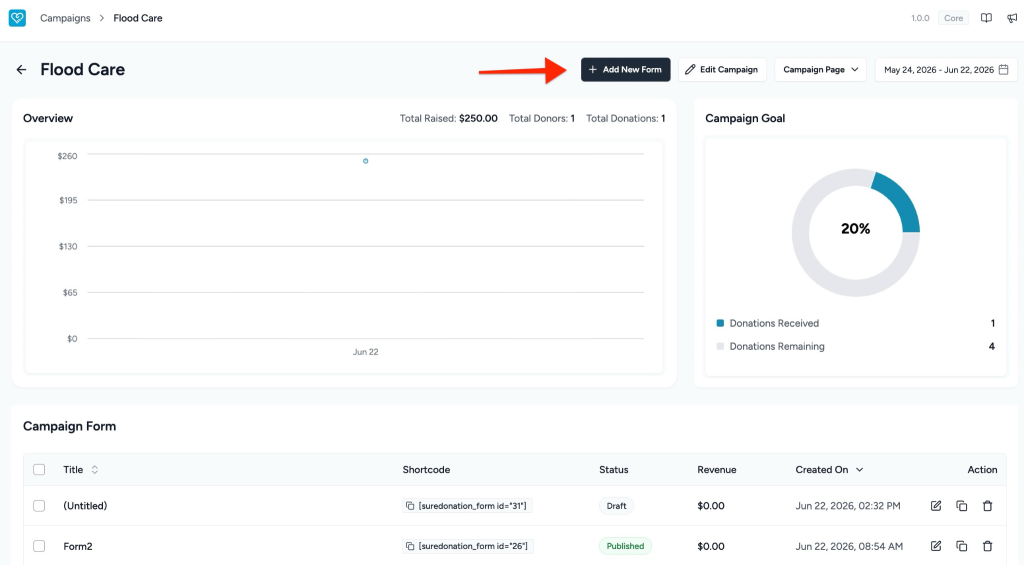
This will open the donation form editor.
Create Your Donation Form
Once the editor opens:
- Enter a Form Title at the top of the page.
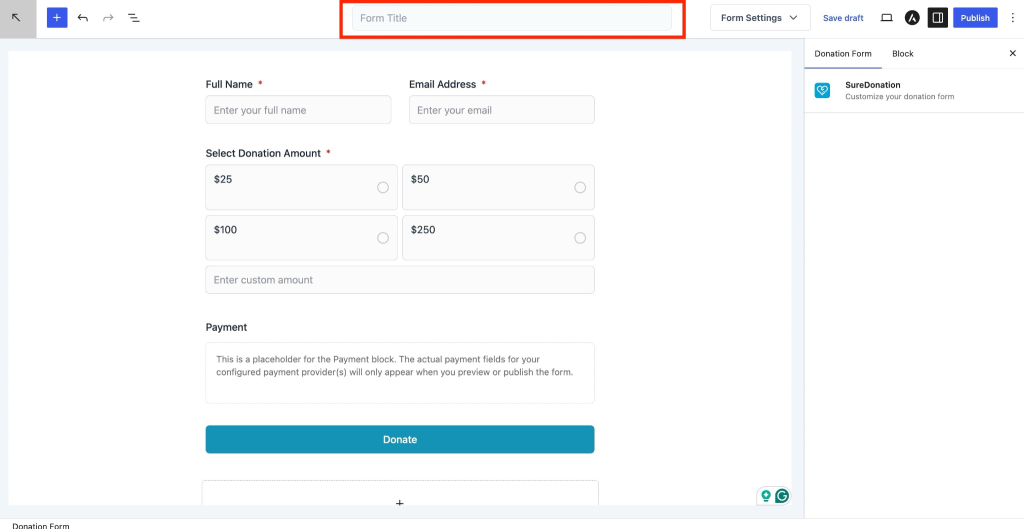
- Configure the donation form using the available blocks.
Default Fields Included
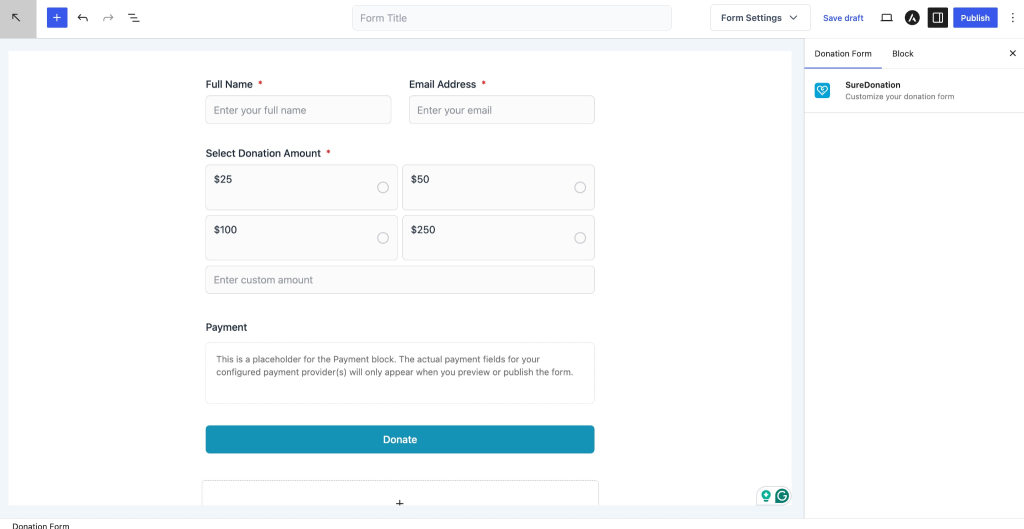
When a new donation form is created, SureDonation automatically adds a few default fields to help you get started quickly.
The default fields include:
Text
Used to collect donor information such as name or custom text input.
Collects the donor’s email address for communication and donation records.
Donation Amount
Allows donors to select predefined donation amounts or enter a custom amount.
Payment
Displays payment-related fields.
Note: Payment provider fields appear only after configuring and enabling supported payment gateways.
Donate Button
Displays the submission button used to complete the donation.
Add More Fields to Customize the Form
You can further customize the donation form by adding additional fields.
To add more fields:
- Click the Add (+) button inside the editor.
- Open the available block list.
- Select the field you want to insert into the form.
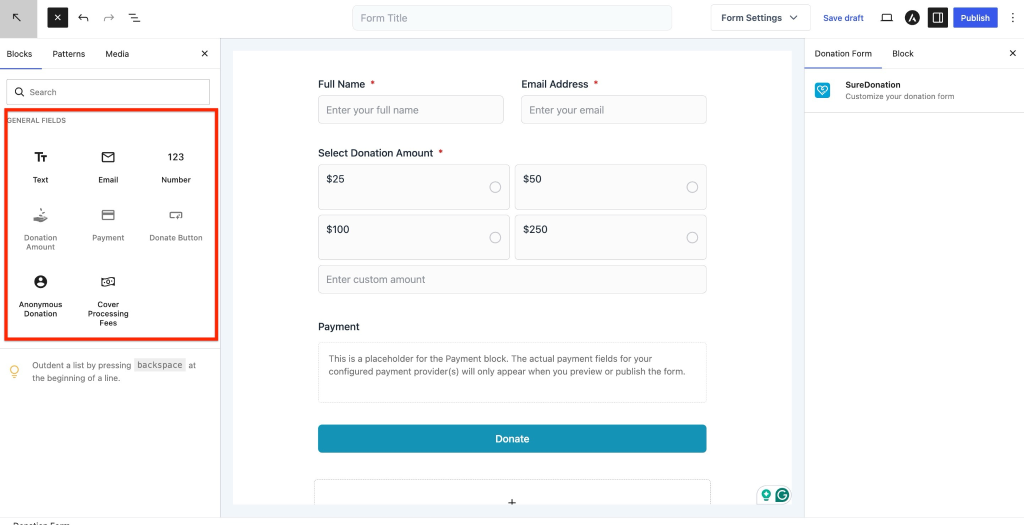
Additional available blocks may include:
- Text
- Number
- Donation Amount
- Payment
- Donate Button
- Anonymous Donation
- Cover Processing Fees
Arrange and configure these fields based on your donation requirements.
Customize Form Settings
Use the Form Settings panel available on the right side of the editor to customize the Form Confirmation and Email Notifications.
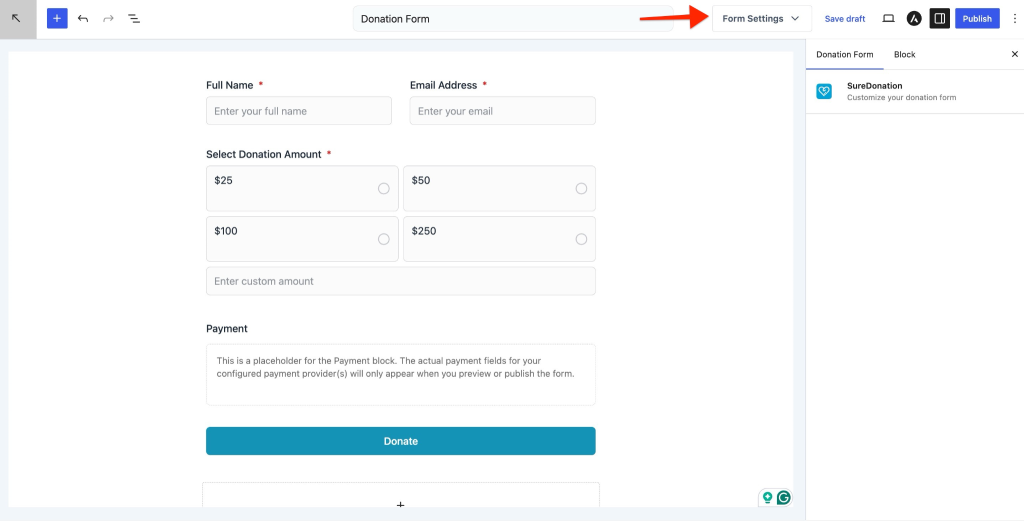
You can adjust settings depending on the selected block and form configuration.
Save and Publish the Form
After completing your configuration:
- Click Save draft to store changes without publishing.
- Click Publish to make the form available for use.
Once published, the form can be connected to your campaign and used to collect donations.
We don't respond to the article feedback, we use it to improve our support content.