
- Add New Form
- Form Settings in SureDonation
- Set a Default Donation Form in SureDonation
- Text Field in SureDonation
- Email Field in SureDonation
- Number Field in SureDonation
- Donation Amount Field in SureDonation
- Payment Field in SureDonation
- Donate Button in SureDonation
- Cover Processing Fees Field
- Handle Custom Stripe Webhook Events
- suredonation_export_secret_option_keys Filter Hook
- suredonation_import_batch_complete Action Hook
- suredonation_import_complete Action Hook
- suredonation_import_donation_inserted Action Hook
- suredonation_import_donor_inserted Action Hook
- suredonation_import_session_created Action Hook
- suredonation_import_givewp_batch_complete Action Hook
- suredonation_import_givewp_session_created Action Hook
- suredonation_privacy_data_exported Action Hook
- Validate Field Filter Hook
- Validatable Blocks Filter Hook
- Update donation data, Filter Hook
- OttoKit Integration: suredonation_suretriggers_integration_data_filter Filter Hook
- suredonation_show_setup_gateway_notice Filter Hook
- suredonation_show_review_notice_gateway Filter Hook
- suredonation_show_review_notice_donation Filter Hook
- suredonation_registered_payment_methods Filter Hook
- suredonation_register_additional_blocks Filter Hook
- suredonation_receipt_html Filter Hook
- Validatable Blocks Filter Hook
- Update donation data, Filter Hook
- OttoKit Integration: suredonation_suretriggers_integration_data_filter Filter Hook
- suredonation_show_setup_gateway_notice Filter Hook
- suredonation_show_review_notice_gateway Filter Hook
- suredonation_show_review_notice_donation Filter Hook
- suredonation_registered_payment_methods Filter Hook
- suredonation_register_additional_blocks Filter Hook
- suredonation_receipt_html Filter Hook
- suredonation_phone_geo_enabled Filter Hook
MailerLite Integration in SureDonation
The MailerLite Integration in SureDonation allows you to automatically add or update donors as subscribers in your MailerLite account when they make a donation.
You can also organize donors into specific MailerLite groups, making it easier to manage your email lists, send updates, and stay connected with your supporters.
With this integration, you can:
- Automatically add donors to your MailerLite subscriber list.
- Update existing subscriber information.
- Assign donors to specific MailerLite groups.
- Manage donor communication and email marketing more efficiently.
Before You Begin
Before connecting MailerLite with SureDonation, make sure you have:
- SureDonation and SureDonation Pro installed and activated.
- An active MailerLite account.
- A MailerLite API token to authorize the connection.
Step 1: Get Your MailerLite API Token
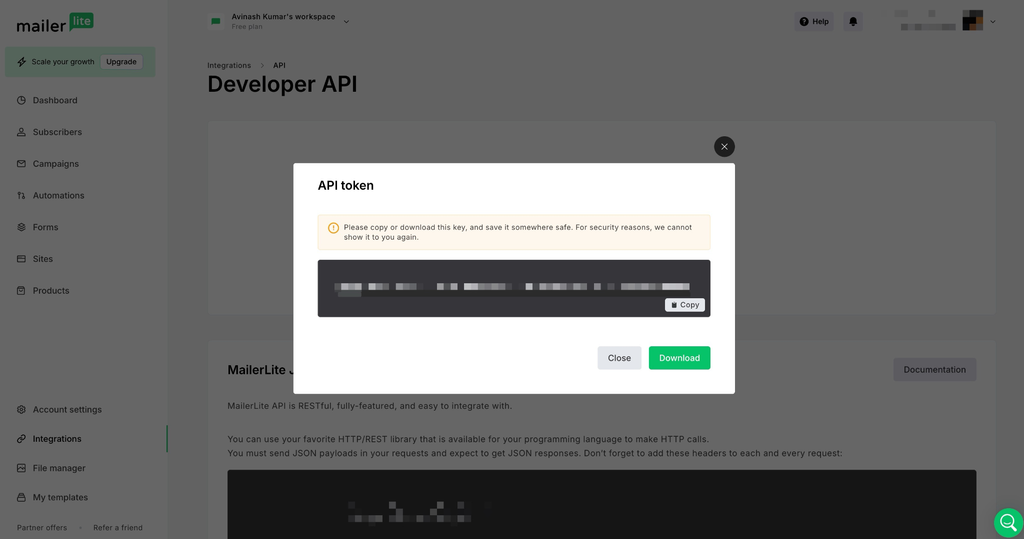
To connect MailerLite with SureDonation, you first need to generate an API token from your MailerLite account.
- Log in to your MailerLite Dashboard.
- Navigate to Integrations → Developer API.
- Create a new API token or use an existing valid token.
- Copy the API token.
You can access the API settings directly from the MailerLite Developer API page.
Step 2: Open Integration Settings in SureDonation
Once you have your MailerLite API token, you can start configuring the integration.
- Log in to your WordPress Dashboard.
- Navigate to SureDonation → Settings.
- Select Integrations from the left sidebar.
- Click the Browse Integrations button.
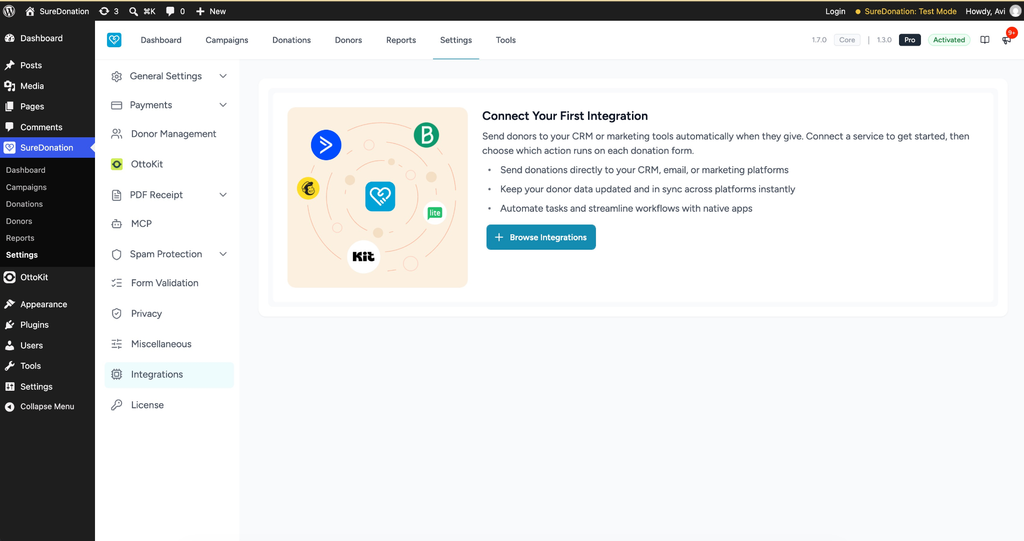
The Integrations section allows you to connect SureDonation with supported email marketing and CRM services.
Step 3: Select MailerLite
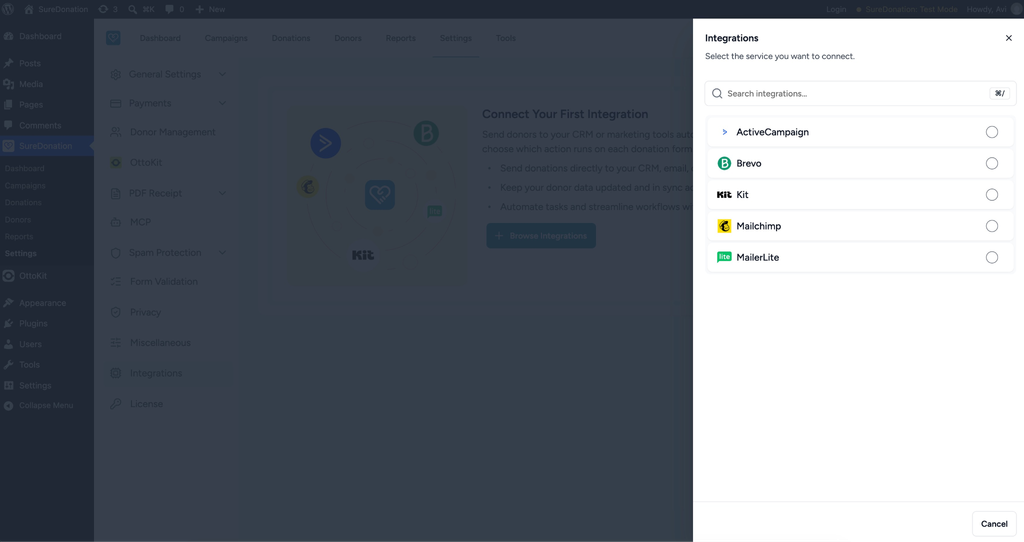
After clicking Browse Integrations, a panel will appear with the available services.
You will find the following integration options:
- ActiveCampaign
- Brevo
- Kit
- Mailchimp
- MailerLite
To select MailerLite:
- Locate MailerLite in the list.
- Select the radio button next to MailerLite.
- Proceed to the connection settings.
You can also use the search field to find MailerLite quickly.
Step 4: Connect Your MailerLite Account
Once you select MailerLite, the connection settings panel will appear.
To connect your account:
- Locate the API token field.
- Paste the API token copied from your MailerLite account.
- Click Connect.
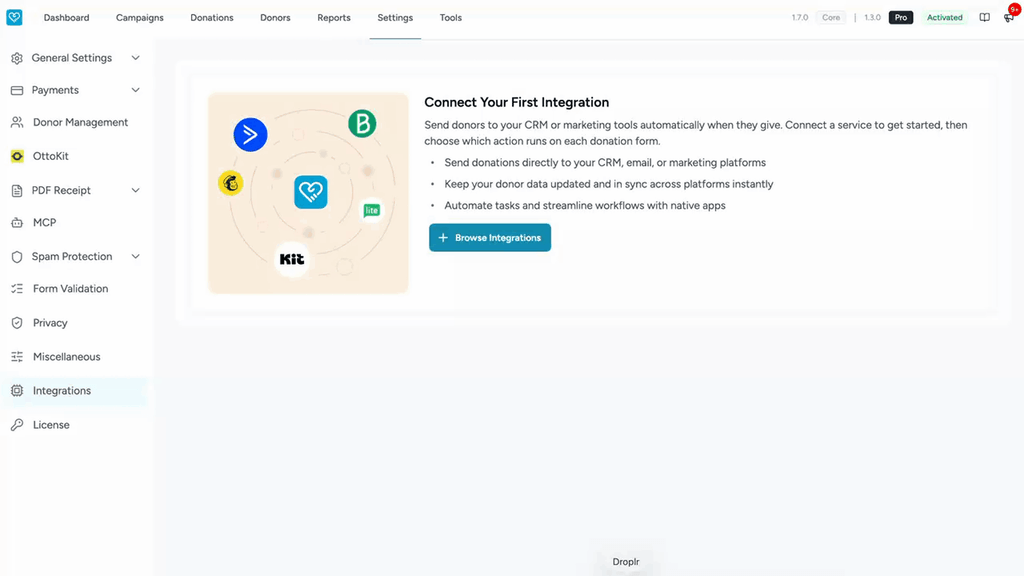
SureDonation will use the API token to establish a connection with your MailerLite account.
After connecting, you can use Test Connection on the saved integration to verify that the credentials are working correctly.
Step 5: Create a MailerLite Workflow
Once MailerLite is connected, you can create a workflow to automatically send donor information to MailerLite.
To create a workflow:
- Navigate to SureDonation → Campaigns.
- Open the campaign where you want to configure the integration.
- Edit the donation form associated with the campaign.
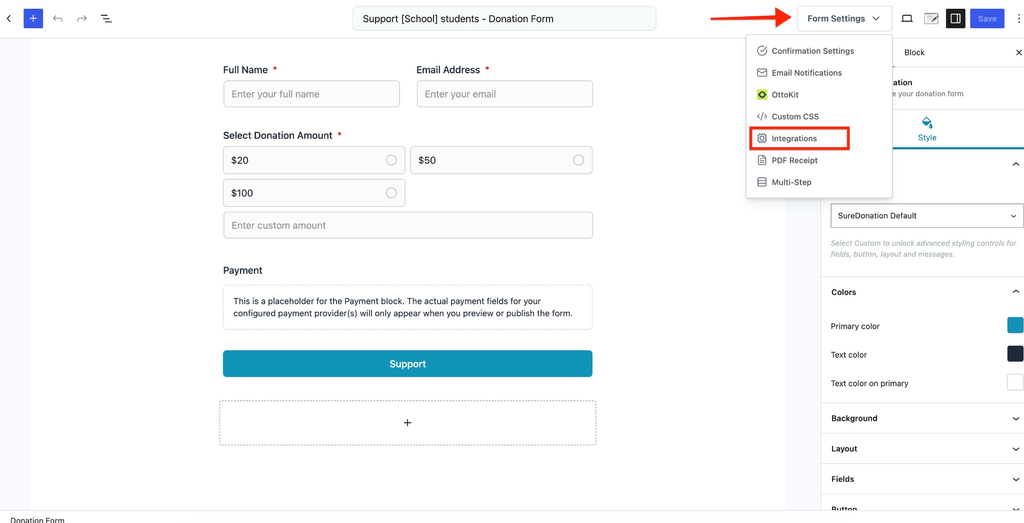
- Click Form Settings in the form editor.
- Select Integrations.
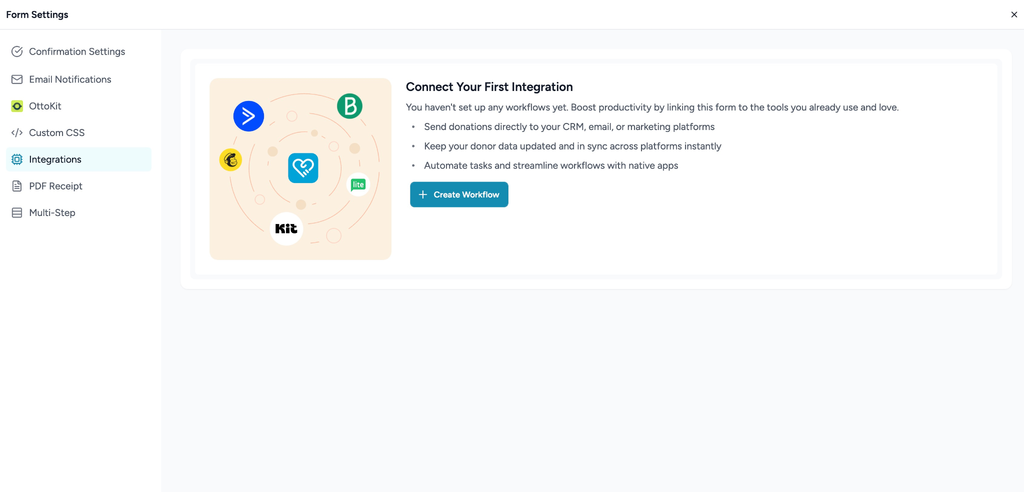
- Click Create Workflow.
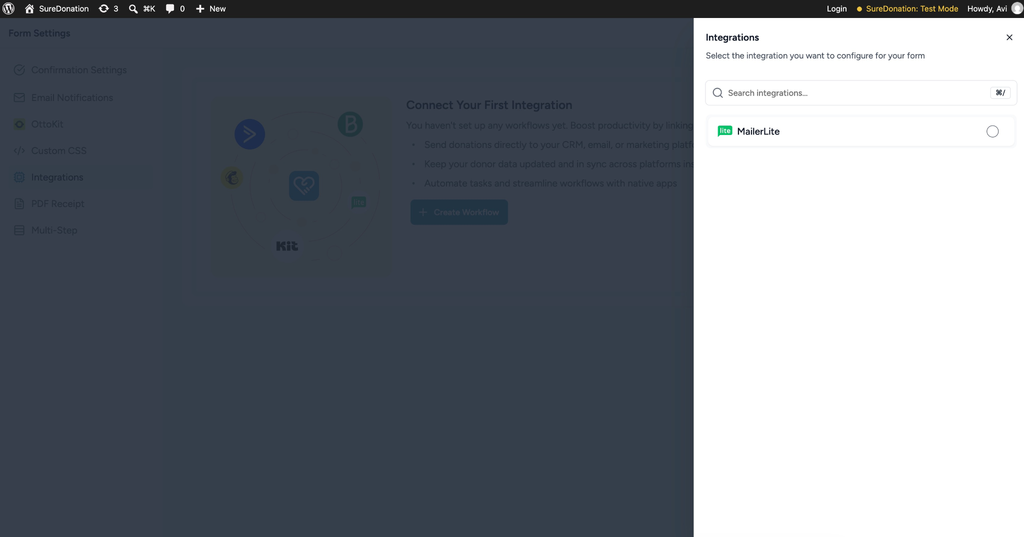
Next, select your connected MailerLite account and click Continue.
Step 6: Configure the MailerLite Workflow
Once you create a workflow, you can configure how donor information should be sent to MailerLite.
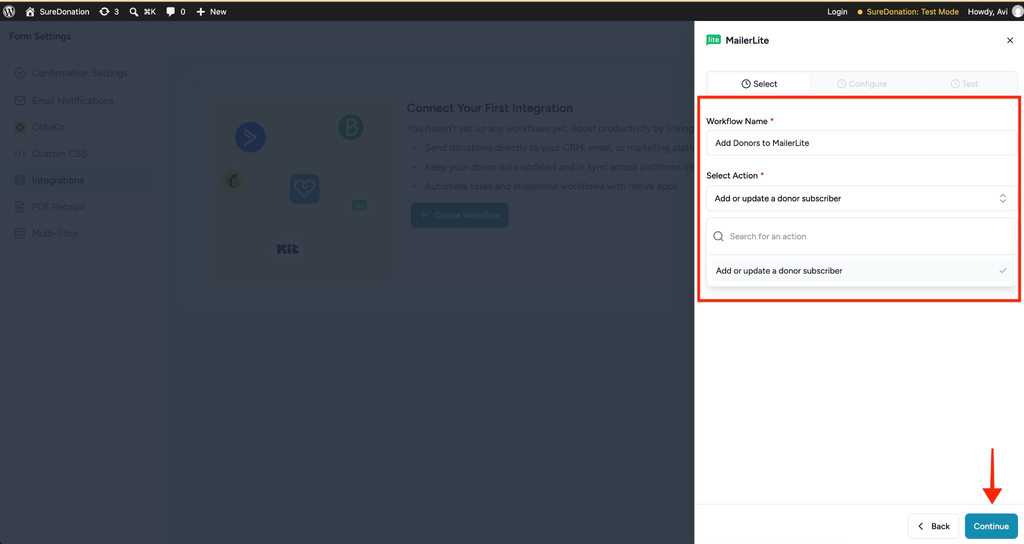
Workflow Name
Enter a name that helps you identify the workflow.
For example:
Add Donors to MailerLite
Select Action
Under Select Action, choose:
Add or Update a Donor Subscriber
This action creates a new subscriber in MailerLite when a donor makes a donation.
If the donor’s email address already exists in MailerLite, the existing subscriber information is updated instead.
Configure Subscriber Fields
You can configure the following fields:
| Field | Required | Description |
| Email Address | Yes | The donor’s email address. By default, this is mapped to the email field in the donation form. |
| Group | No | Select the MailerLite group where you want to add the donor. |
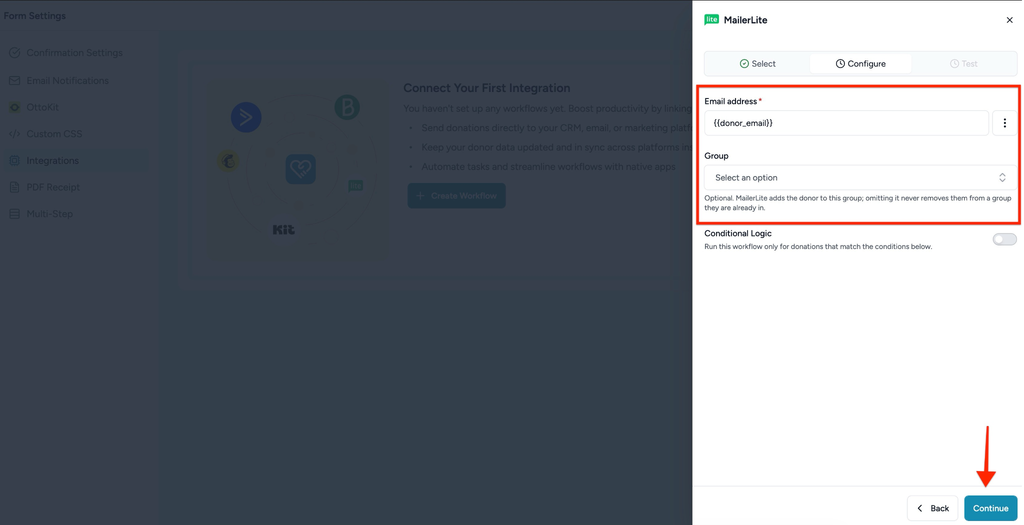
Step 7: Test and Save the Workflow
Once you have configured the MailerLite workflow, you can test it before using it on your live donation form.
To test the workflow:
- Review the configured workflow settings.
- Click Test Workflow to check the integration.
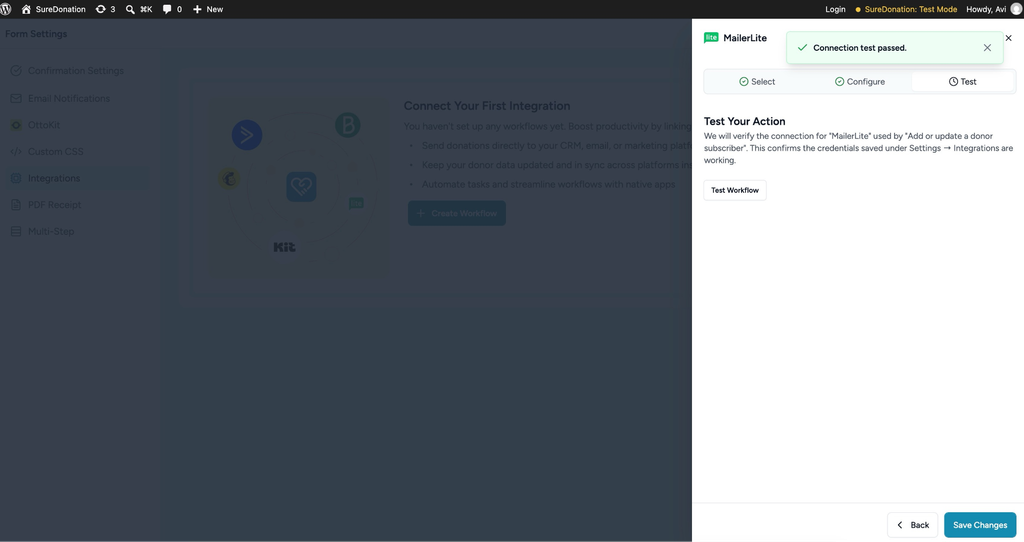
- Verify that the test completes successfully.
- Save the workflow.
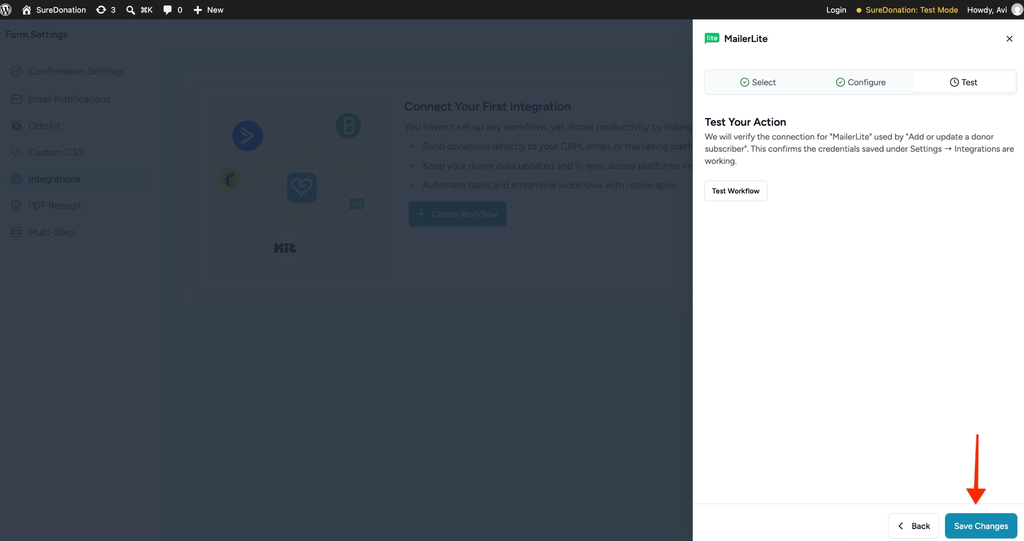
- Make sure the workflow is enabled.
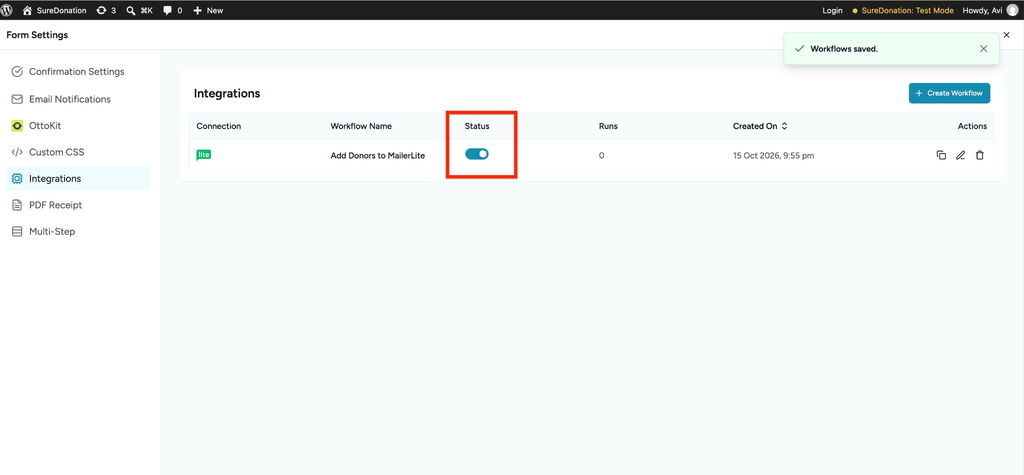
- Save or update your donation form.
Step 8: Test the Integration
After saving the workflow, you can verify that donor information is being sent to MailerLite.
- Open the donation form on your website.
- Enter the donor’s name, email address, and donation amount.
- Complete a test donation.
- Log in to your MailerLite Dashboard.
- Navigate to the Subscribers section.
- Check whether the donor has been added or updated.
- If you configured a group, verify that the donor appears in the selected group.
If the donor appears in MailerLite with the expected details, the integration is working correctly.
Using Conditional Logic
SureDonation also allows you to use Conditional Logic to control when the MailerLite workflow should run.
For example, you may want to add donors to a specific MailerLite group only when they donate to a particular campaign or meet certain conditions.
To configure this:
- Open the MailerLite workflow in your donation form.
- Locate the Conditional Logic settings.
- Configure the conditions that should trigger the workflow.
- Save the changes.
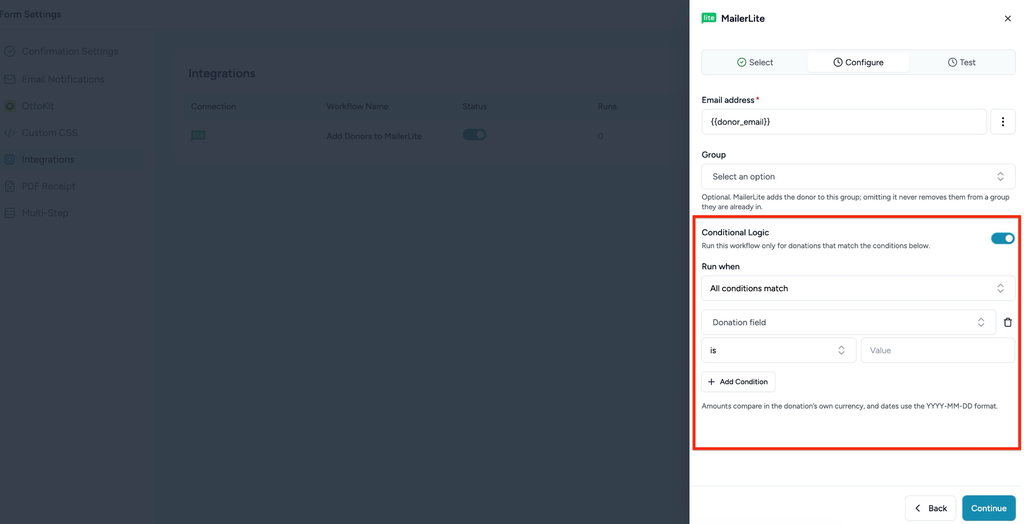
With Conditional Logic, you can control which donations trigger the MailerLite integration.
Example: Add Education Campaign Donors to MailerLite
Suppose you are running an education fundraising campaign and want to add donors to a MailerLite group named Education Supporters.
You can configure the workflow as follows:
| Setting | Value |
| Integration | MailerLite |
| Workflow Name | Education Campaign Subscribers |
| Select Action | Add or Update a Donor Subscriber |
| Email Address | Donor Email |
| Group | Education Supporters |
With this configuration, when a donor completes a donation and the workflow runs:
- SureDonation sends the donor’s email address to MailerLite.
- MailerLite creates a subscriber or updates the existing subscriber.
- The donor is added to the Education Supporters group.
You can then use this group in MailerLite to send campaign updates, newsletters, and other relevant communications.
That’s it! You have successfully connected MailerLite with SureDonation Pro. You can now automate subscriber management, organize donors into groups, and manage communication with your supporters more efficiently.
We don't respond to the article feedback, we use it to improve our support content.